Missouri S&T-themed pumpkin carving stencils
How to Carve an S&T Pumpkin
- Carve Out Top
Carve a circular opening from the top of your pumpkin. Cut the lid at an angle so the outside diameter is larger than the inside. This prevents the top from falling into the pumpkin when it shrinks. - Clean and Scrape
Clean out the seeds and strings using a large spoon or ice cream scooper. Scrape inner pulp away from the area you plan to carve until the pumpkin interior wall is about 1” thick. - Attach Pattern
Trim the pattern and tape it to your pumpkin. Make pattern fit smoothly by folding the paper as needed. Tape the folds in place. - Transfer Pattern
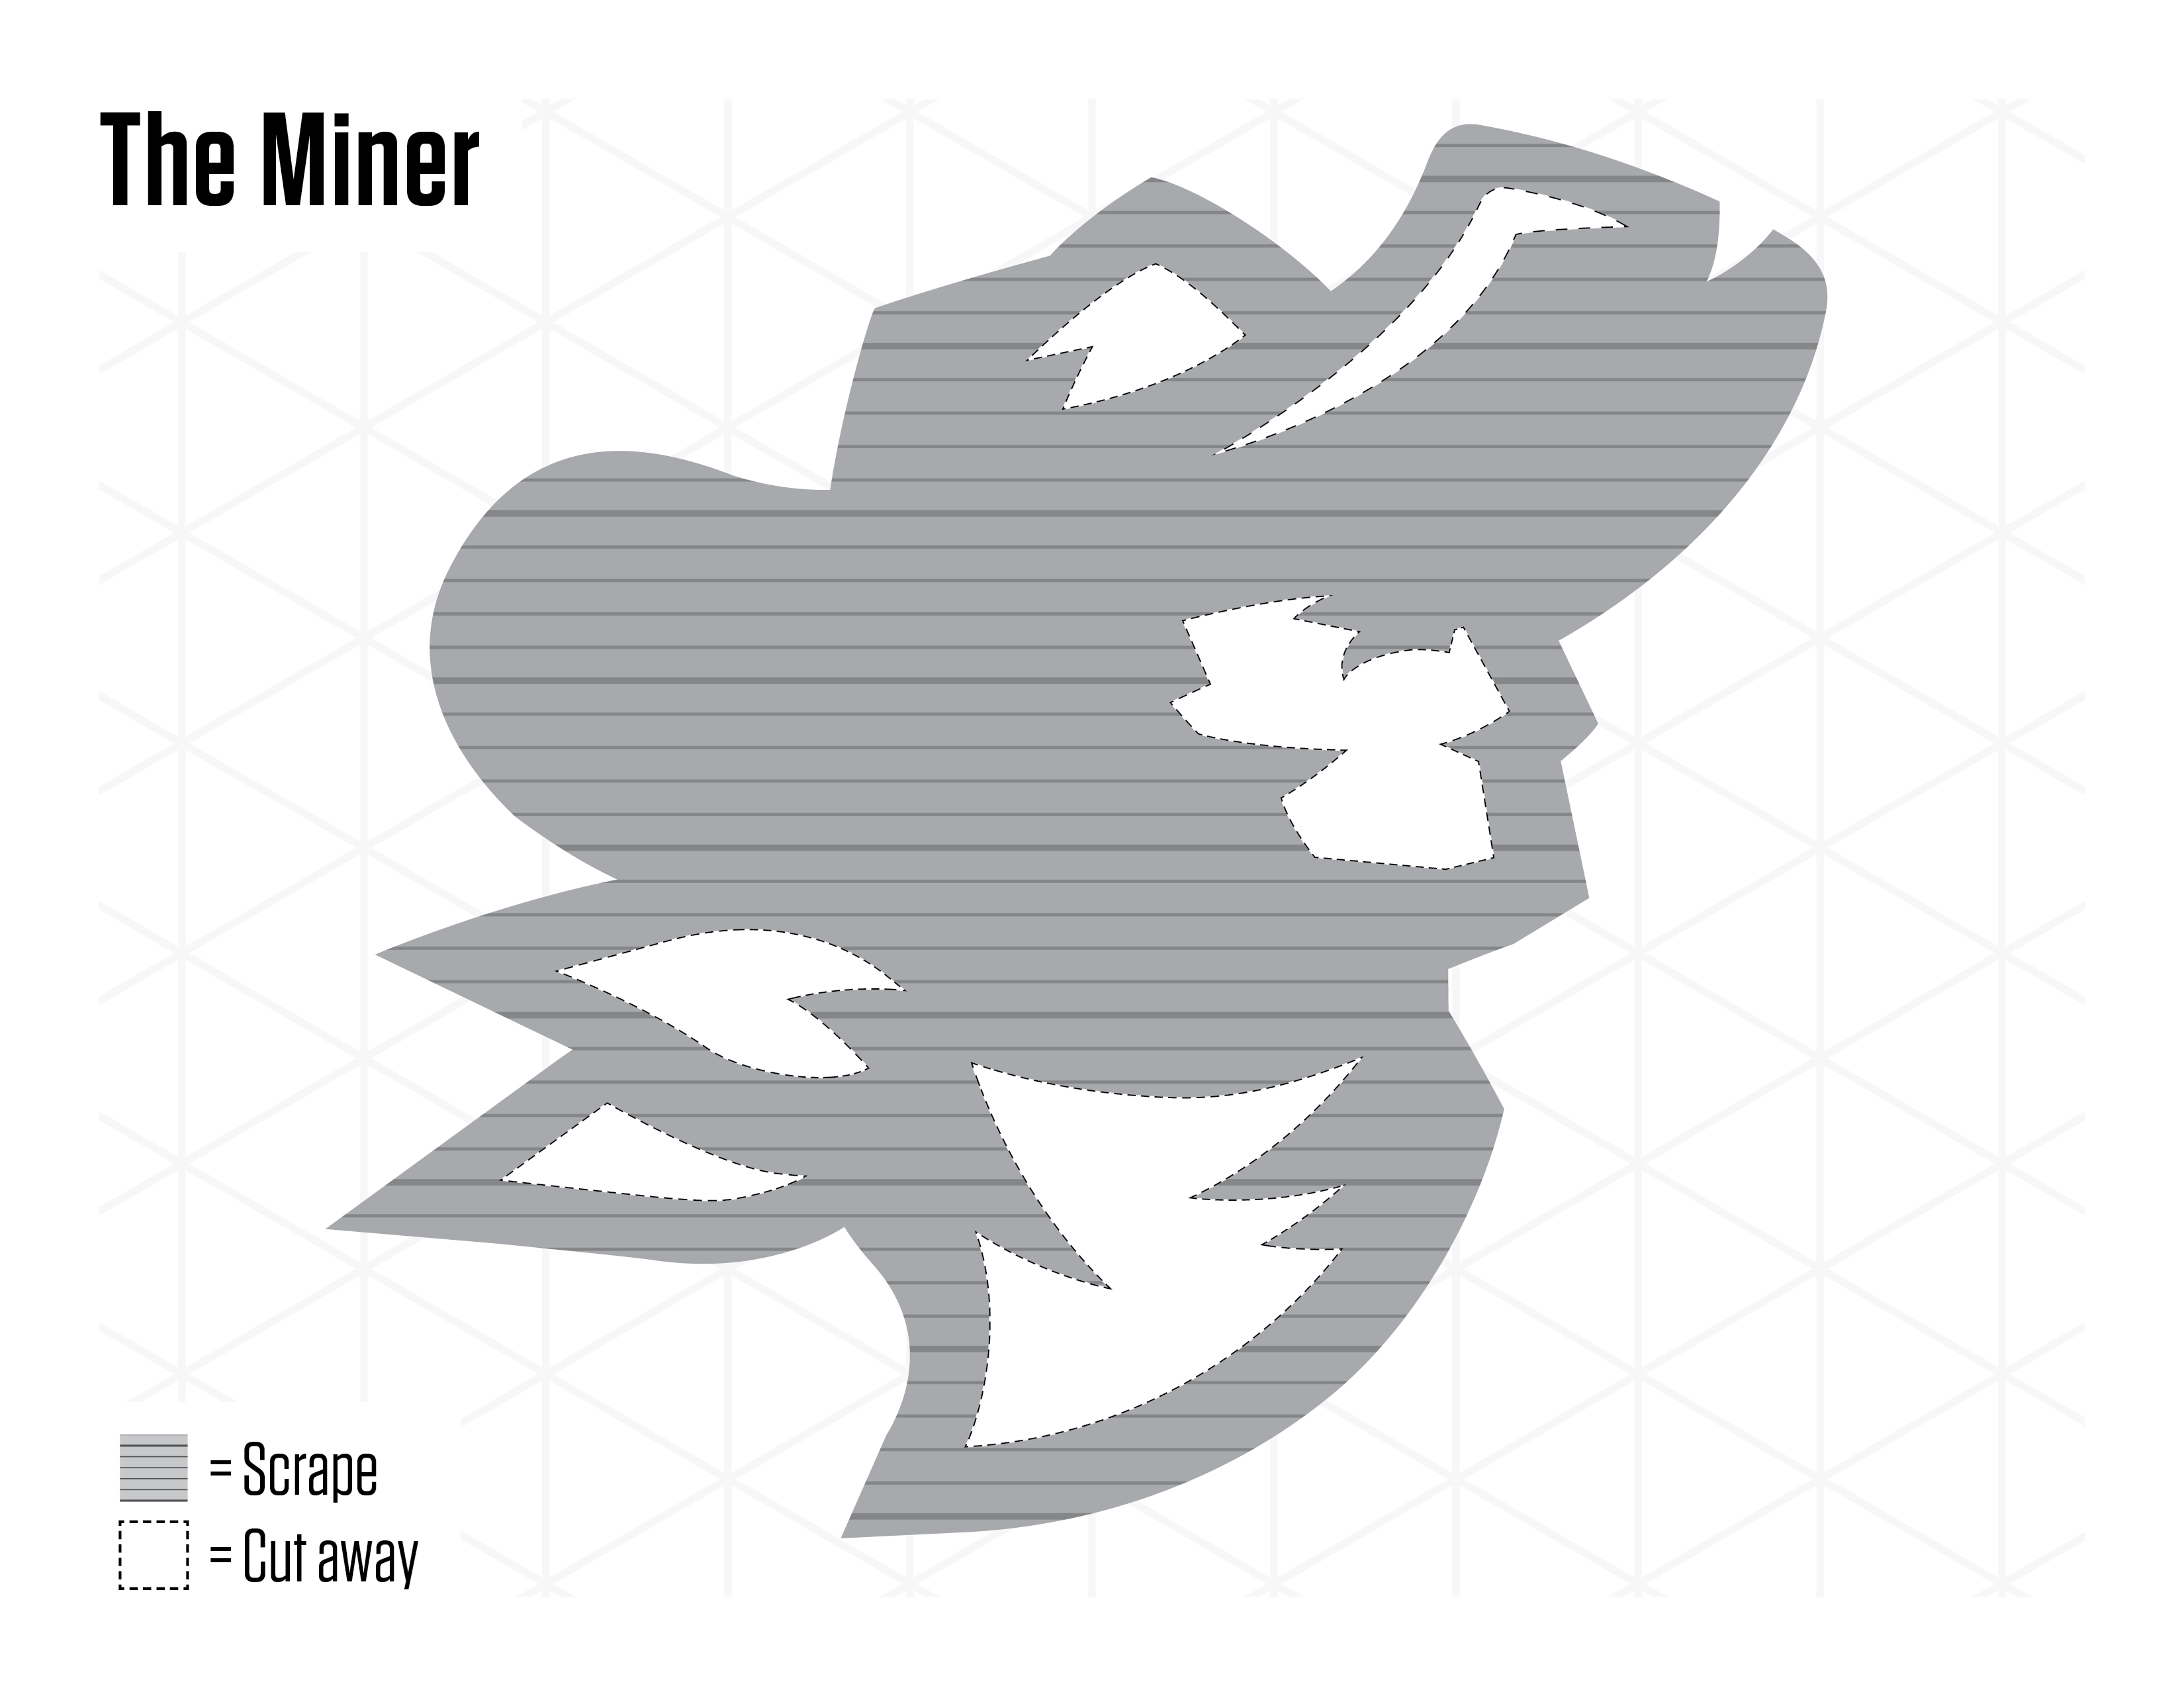
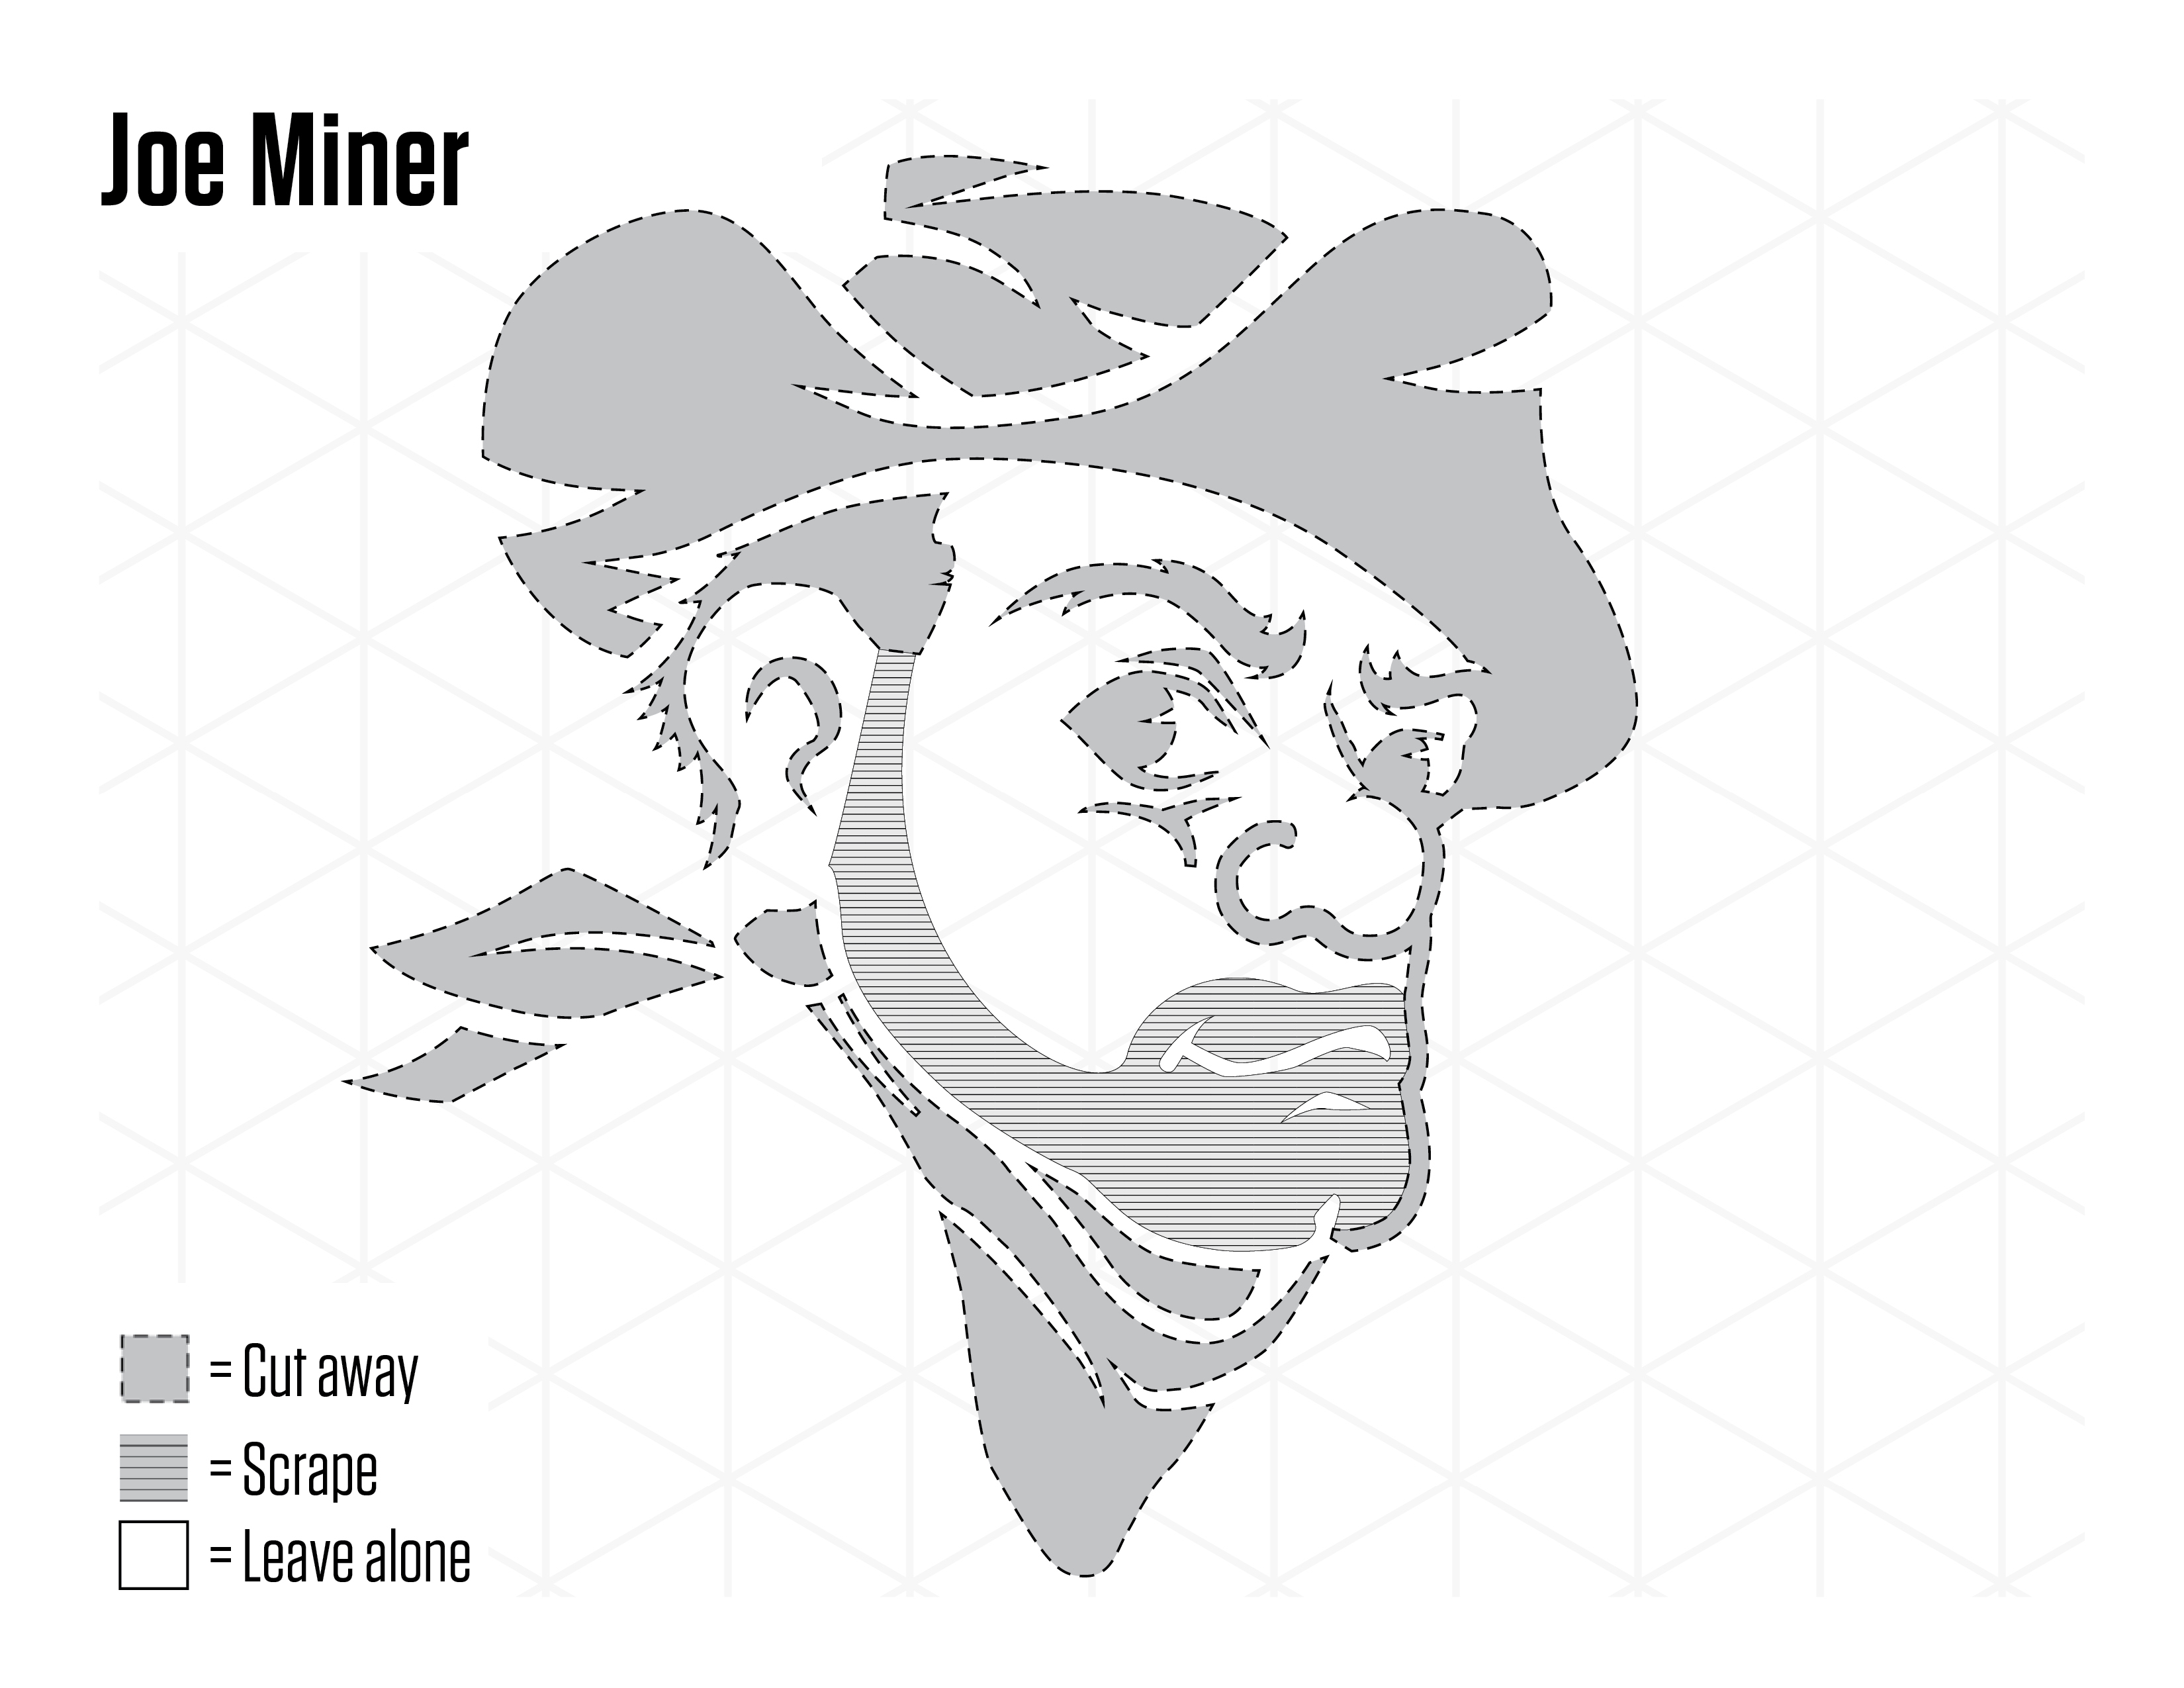
Use a sharp awl, needle tool or T-pin to transfer the pattern, poking along the outlines. When the design is completely transferred, remove the paper pattern. - Carve Design
Use a sharp, straight-edged knife to cut, carving away from yourself. Start with the features closest to the center first and work outward. For tight corners, pull the saw out and reinsert to change direction. Use an X-Acto knife for details and the tip of a potato peeler to make small circles and curves. - Light It Up
There are many candle-free options. Check stores for color-changing strobe lights, battery-operated tea lights and rainbow LEDs that are made specifically for pumpkins. If using a candle, select a votive or pillar candle placed on a plate large enough to catch any drips. - Snap a Photo and Share
Show off your completed masterpiece. Tag your photo on S&T’s Facebook page, Instagram account or send a tweet to @MissouriSandT.
Play It Safe
Always use adult supervision – Let the adults or older children do the carving. Kids can still get involved with the process by helping pick out the pattern, drawing the pattern and cleaning out the inside of the pumpkin.
Download File
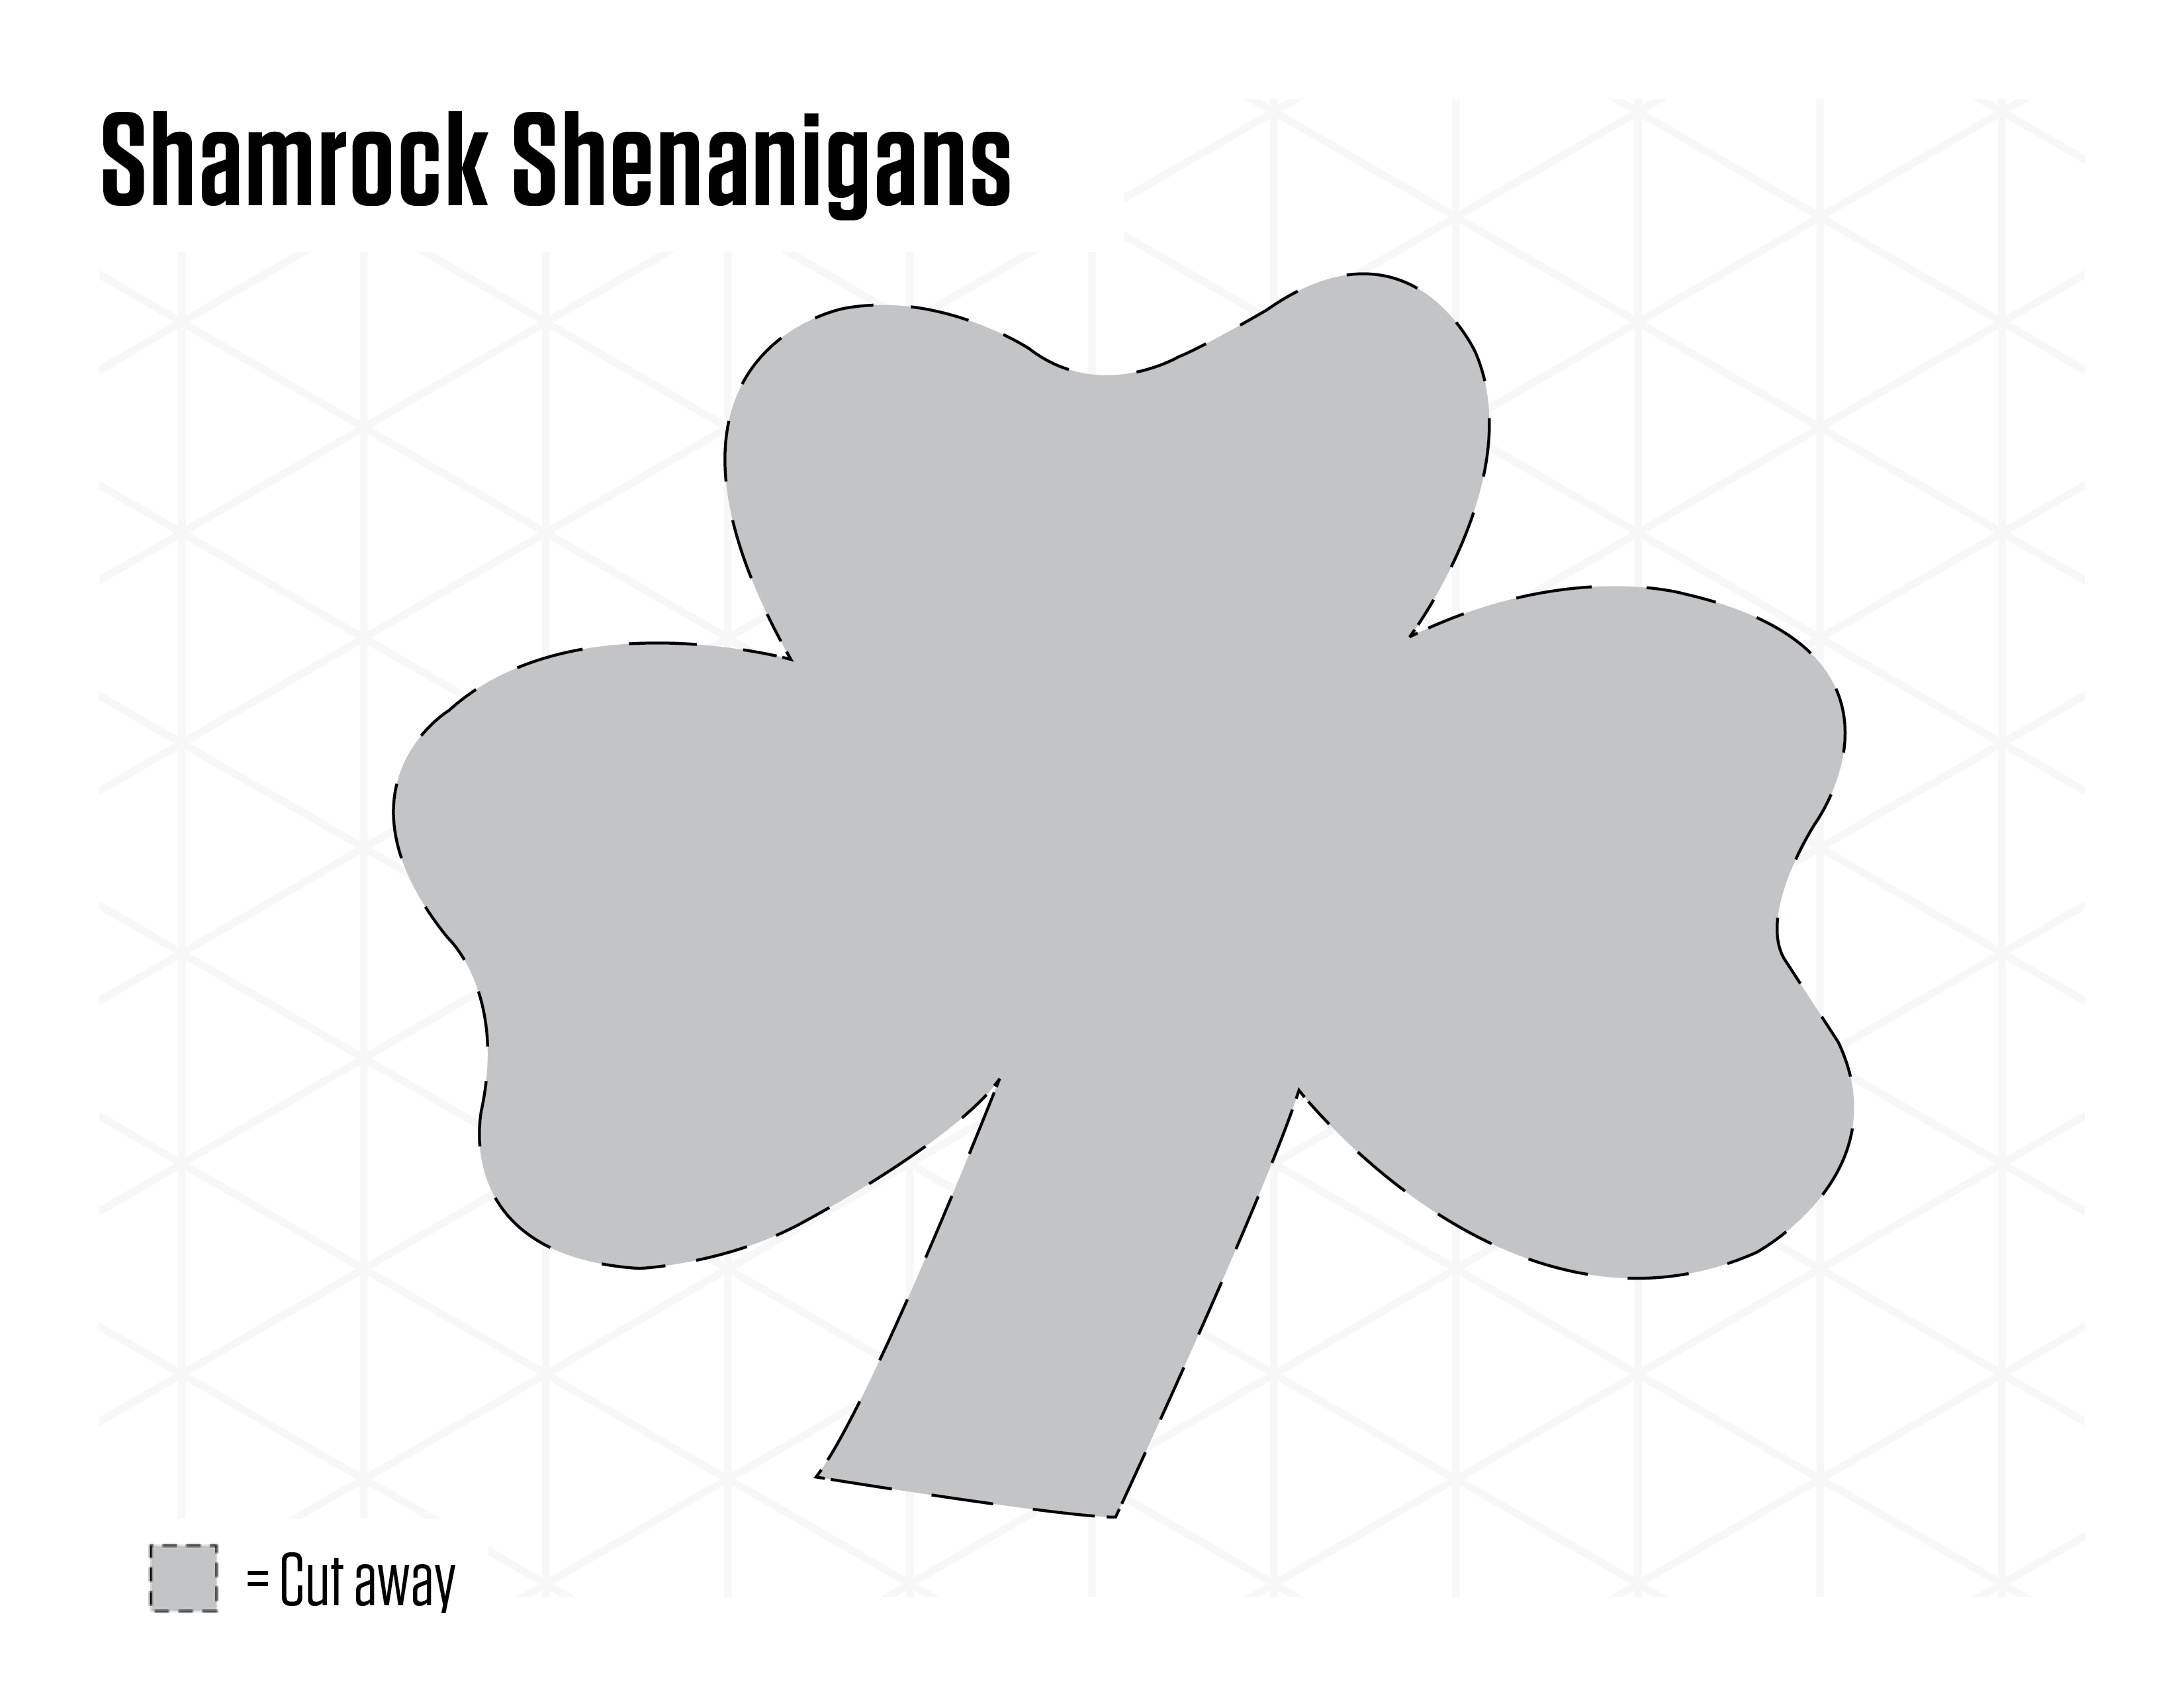
Best Ever
Best Ever, Forever. It may be October, but we always celebrate St. Pats.
Download the stencil
Download File
150th Anniversary
Show your support of this university milestone.