Standard Image

The Standard Image content type allows you to place a large headline image in a responsive container onto your pages, and can work with the Wrapping Body Content content type to allow the text of your page to wrap around, like in a newspaper.
The content type supports a number of features such as customizable captions and links, and allows for flexible positioning on the page in a number of sizes and positions.
Please note that this content type is recommended only for important images, especially with wrapping text, and is not appropriate for every image on your page. Images can still be inserted inline with your content like normal in your content editor.
Adding an Image Container
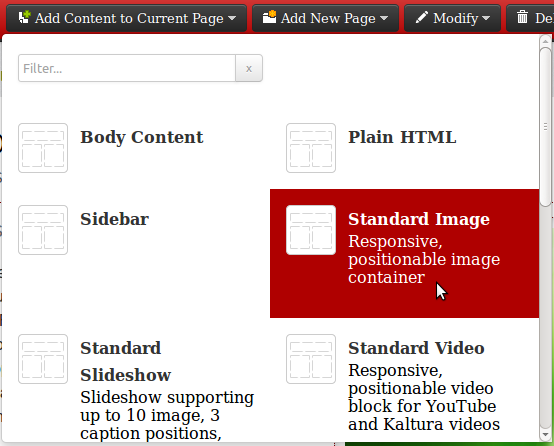
To add a responsive image container to your page, click "Add Content to Current Page" in the top bar of your Direct Edit window and select "Standard Image"
You will be presented with the following editing window:
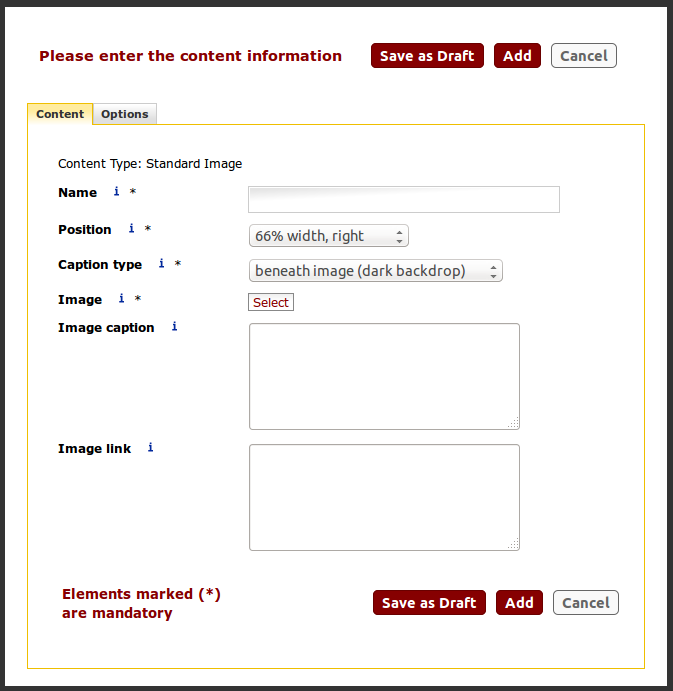
Please fill in the "Name" box with a unique name for the content item. This field will not show up anywhere on your finished page.
Options and Features
The Standard Image content type can be customized in a number of ways to suit the needs of the page you are creating by changing the values in a couple of simple select boxes.
Positioning
The "Position" dropdown includes a range of options such as "66% width, center," "Full width," "50% width, left," and "33% width, right" that allow you to choose where your image should appear on the page. Each set of positions behaves similarly when viewed on increasingly small screens: When the content wrapping around the image has too little room left to display in a suitably readable fashion, the image will expand to take up the full screen width, pushing any content it displaces below itself.
Content authors are encouraged to use the 50% and 66% width options except under special circumstances, such as when a short, wide image would be appropriate across the full page (select "Full width") or when images are too small to be blown up to 33% of the page width on some monitors (select "Natural width").
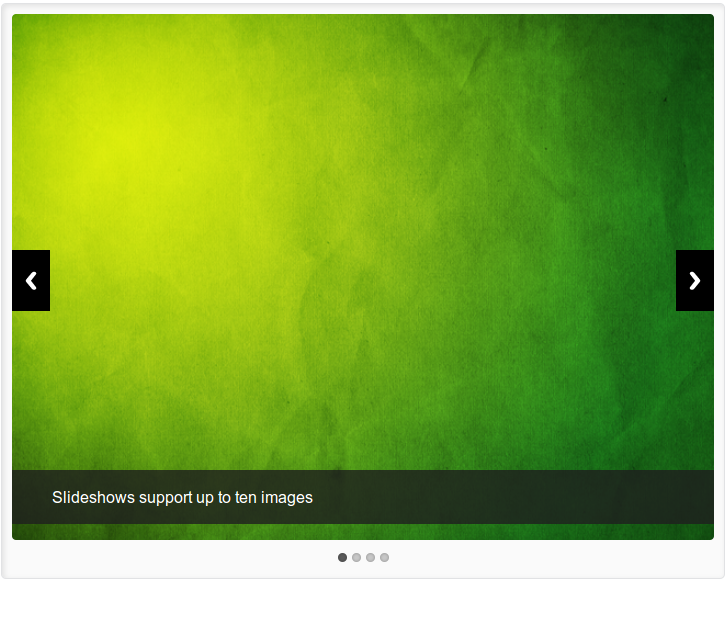
Captions
The Caption type box allows you to customize where your captions should appear relative to the slide if captions are used.
Selecting/Uploading Images
The Standard Image content type will require that you upload an image, or use an image already uploaded into your Media Library. To begin the process of adding an image, click "Select."
You will be presented with your Media Library. If the image you'd like to use is already in your Media Library, click on it, then click the "Select" button to use it in the responsive image container.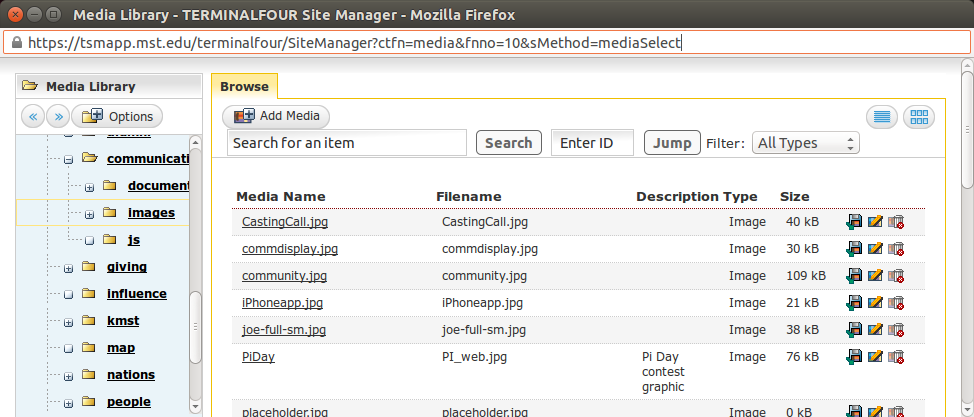
If you have not yet uploaded the image you would like to use, click the "Add Media" button above the list of files in your Media Library:
You will be shown a series of fields, three of which you will need to fill in. The first is the name of the image--be sure to name it such that when you see it in the future, you'll know what it's for (e.g. "Rover Headline Image"). The next box is the description, which is the alt text that is accessible when a user hovers their mouse over the image or uses a screen reader. Write a short (10 words or fewer) description of the image, then proceed down to the "Media" line:
Click "Browse..." and locate your image on your computer, then click the "Add" button:
You will now be taken back to your Media Library, and the new image will be on the list. Click the image name and click "Select."
Adding Links and Captions
Below the image selection are two boxes wherein you may enter an image link and an image caption. Both of these fields are optional.
If you would like users to click an image in your image and be taken to another page, paste that page's URL in the "Image Link" box.
If you would like a caption on or under an image, enter it into the "Image Caption" box beneath the desired image. If your caption needs a link in it, you must write the link in HTML, like so:
This is a caption with a <a href="http://www.google.com/">link to Google</a>
When shown on the page, this will read as "This is a caption with a link to Google"
Wrapping Body Content Behavior
To wrap text around your image, place a "Wrapping Body Content" content type immediately after the image content item.
FAQ
How is this different from pressing the image button in my editor and showing the image inline with the text?
Your TinyMCE content editor is capable of placing images onto your page; however, these images do not go into a responsive container and require significant tweaking to get them positioned correctly, padded correctly, and generally working well with your text. Additionally, the resulting image is not responsive (unless you use the fit or stretch classes)--no matter what screen it's shown on, it will be in the same position at the same size, which can lead to problems on mobile phones. Using the Standard Image content type for important, headline images ensures that your image is displayed beautifully on all devices, positions itself effortlessly into your text content, and takes the visual priority you intended for it.
Can I still use normal images?
Absolutely. This content type does not affect your ability to place images into your body content.
Why is my image hanging off my page?
When an image extends out of the page's bounds, it is usually because the content author selected "Natural width" with a large image. Natural width positioning does not attempt to scale your image and is recommended only for very small images. If your image is too big, try changing to a 66% or 50% width positioning.